
Table of Contents
Imagine biting into a gooey, chocolatey brownie. Mmm, right? But what if I told you that you could enjoy that amazing brownie taste without tons of sugar? Think it’s too good to be true? Well, get ready to be surprised! This recipe proves that you can have your brownie and eat it too – guilt-free and deliciously sweet, just in a smarter way.
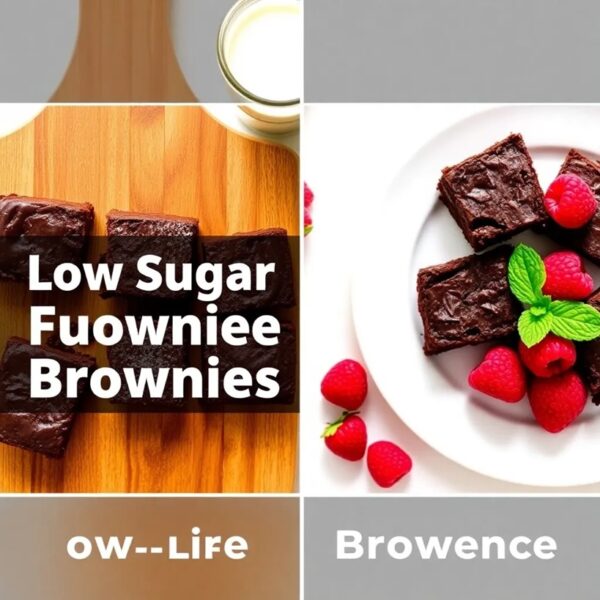
Overview: Your New Favorite Low Sugar Treat
This isn’t just any brownie recipe; it’s a game-changer! Our low sugar brownie recipe is special because it’s designed to be super yummy while keeping the sugar way down. It’s perfect for anyone who’s watching their sugar intake but still wants a fantastic treat. Plus, it’s easy to make!
Time to Bake: About 40 minutes (including prep and baking)
Difficulty Level: Super Easy (like building with LEGOs!)
This recipe is all about making healthy choices without missing out on fun and flavor. You’ll be amazed at how rich and fudgy these brownies are, even with less sugar. Get ready to impress your friends and family (or just yourself!) with these incredible low sugar brownie recipe!
Essential Ingredients: The Magic Makers
Let’s talk about what goes into making these brownies so special. Each ingredient plays an important role in making sure they are both healthy and delicious.
| Ingredient | Why It’s Important | Substitutions & Variations |
|---|---|---|
| Unsweetened Cocoa Powder | This is the heart of our brownie’s chocolate flavor! Using unsweetened cocoa lets us control the sweetness and keeps the sugar low. | For a richer flavor, use dark cocoa powder. |
| Sugar Substitute (like Erythritol or Stevia blend) | This is our secret weapon to keep the sugar down! Sugar substitutes provide sweetness without all the sugar calories. Erythritol and Stevia blends are great because they taste good and don’t raise blood sugar much. | You can also use other sugar substitutes like monk fruit sweetener. Just make sure to use the right amount based on the package instructions, as they can vary in sweetness. |
| All-Purpose Flour (or Almond Flour) | Flour gives the brownies structure. All-purpose flour makes them chewy, while almond flour makes them gluten-free and a bit denser. | For gluten-free brownies, use almond flour or a gluten-free all-purpose blend. Coconut flour is another option, but you’ll need to adjust the liquid as it absorbs more moisture. |
| Eggs | Eggs bind everything together and add moisture and richness. | For vegan brownies, you can use flax eggs (1 tablespoon flaxseed meal mixed with 3 tablespoons water, let sit for 5 minutes) or applesauce (1/4 cup applesauce per egg). |
| Melted Butter (or Coconut Oil) | Butter makes brownies rich and moist. Coconut oil is a dairy-free option that also adds a nice flavor. | You can also use other oils like avocado oil or olive oil, but butter and coconut oil give the best brownie texture. |
| Vanilla Extract | Vanilla boosts all the other flavors and makes the brownies taste even better! | Try almond extract for a slightly different flavor twist. |
| Baking Powder | A little baking powder gives the brownies a bit of lift and keeps them from being too dense. | Don’t use too much, or your brownies might be cakey instead of fudgy! |
| Salt | Just a pinch of salt balances the sweetness and enhances the chocolate flavor. | Don’t skip the salt! It makes a big difference. |
| Optional Mix-ins (like nuts, chocolate chips, or berries) | These are the fun extras! Add nuts for crunch, chocolate chips for extra chocolatey goodness, or berries for a fruity twist. | Get creative! Try chopped pecans, walnuts, sugar-free chocolate chips, raspberries, or even a swirl of peanut butter. |
Step-by-Step Instructions: Let’s Bake!
Ready to make some amazing low sugar brownie recipe? Follow these simple steps, and you’ll be enjoying warm, delicious brownies in no time!
- Get Ready: Preheat your oven to 350°F (175°C). Grab an 8×8 inch baking pan and grease it or line it with parchment paper. This stops the low sugar brownie recipe from sticking and makes them easy to take out later.
- Melt the Goodness: In a microwave-safe bowl or a saucepan, melt the butter (or coconut oil). If using a microwave, do it in short bursts so it doesn’t splatter. If using a saucepan, melt it over low heat. Once melted, stir in the cocoa powder until it’s smooth and chocolatey.Tip: Mixing the cocoa with melted butter first helps create a richer chocolate flavor.
- Sweeten it Up: Add your sugar substitute to the melted chocolate mixture and stir well. Let it cool for a few minutes – we don’t want to cook the eggs in the next step!
- Egg Power: Crack in the eggs one at a time, mixing well after each one. Then, stir in the vanilla extract.
- Dry Ingredients Unite: In a separate bowl, whisk together the flour, baking powder, and salt. This helps to evenly distribute the baking powder and salt throughout the batter.
- Combine Everything: Slowly add the dry ingredients to the wet ingredients, mixing until just combined. Don’t overmix! Overmixing can make brownies tough. It’s okay if there are a few streaks of flour left, they’ll mix in as you add the next ingredients.
- Mix-in Magic (Optional but Fun!): If you’re using any mix-ins like nuts or chocolate chips, gently fold them into the batter now.
- Pour and Bake: Pour the brownie batter into your prepared baking pan and spread it evenly.
- Bake Time: Bake for 20-25 minutes, or until a toothpick inserted into the center comes out with moist crumbs (not wet batter).Cooking Tip: Don’t overbake! Overbaked brownies will be dry. They should be a little fudgy in the center.
- Cool Down: Let the brownies cool in the pan for at least 15-20 minutes before cutting. This helps them set and makes them easier to slice.
- Enjoy!: Cut into squares and enjoy your delicious low sugar brownie recipe!
Assembly and Presentation: Make them Look Amazing
These low sugar brownie recipe are delicious on their own, but a little presentation can make them even more special! Here are some fun ideas:
- Classic Squares: Simply cut them into squares. This is perfect for everyday enjoyment.
- Dust with Cocoa Powder: For a fancy touch, dust the tops with a little extra unsweetened cocoa powder before serving.
- Sugar-Free Chocolate Drizzle: Melt some sugar-free chocolate chips and drizzle it over the cooled brownies. Let it set for a beautiful finish.
- Fresh Berries and Cream (or Yogurt): Serve warm brownies with fresh berries like raspberries or strawberries and a dollop of sugar-free whipped cream or Greek yogurt. This adds a burst of freshness and flavor.
- Brownie Sundae: Warm up a brownie square and top it with sugar-free ice cream and a sprinkle of nuts. Instant dessert heaven!
- Fun Shapes: Use cookie cutters to cut the cooled brownies into fun shapes like stars or hearts, especially for parties or holidays.
Presentation Tip: For clean cuts, use a plastic knife or run a regular knife under hot water between cuts. This will prevent the brownies from sticking to the knife.
Storage and Make-Ahead Tips: Brownies Anytime!
Want to enjoy these low sugar brownie recipe throughout the week? Here’s how to store them and even make parts ahead of time:
- Storing at Room Temperature: Store cooled brownies in an airtight container at room temperature for up to 3-4 days. They will stay moist and delicious.
- Storing in the Fridge: For longer storage (up to a week), store them in an airtight container in the refrigerator. They might become a bit firmer in the fridge, but they’ll still taste great.
- Freezing Brownies: Brownies freeze really well! Wrap them individually in plastic wrap, then place them in a freezer-safe bag or container. They can be frozen for up to 2-3 months. Thaw them at room temperature or in the refrigerator before enjoying.
- Make-Ahead Batter: You can prepare the brownie batter a day ahead of time. Store it covered in the refrigerator. When you’re ready to bake, just pour it into the pan and bake as directed.
- Reheating Brownies: If you want to warm up a brownie, you can microwave it for about 10-15 seconds. Be careful not to overheat, or it might become dry. You can also warm them in a low oven (around 250°F or 120°C) for about 5-10 minutes.
Recipe Variations: Brownie Adventures!
Once you’ve mastered the basic low sugar brownie recipe, get ready to experiment! Here are some fun variations to try:
- Peanut Butter Swirl Brownies: Swirl in some sugar-free peanut butter into the batter before baking. Use a knife to create swirls for a beautiful marbled effect.
- Mint Chocolate Brownies: Add a teaspoon of mint extract to the batter and top with sugar-free chocolate chips or a drizzle of sugar-free mint chocolate syrup after baking.
- Espresso Brownies: Add a teaspoon of instant espresso powder to the dry ingredients for a deeper chocolate flavor with a hint of coffee.
- Coconut Brownies: Add 1/2 cup of shredded unsweetened coconut to the batter and sprinkle some extra on top before baking.
- Orange Zest Brownies: Add the zest of one orange to the batter for a bright, citrusy twist.
- Double Chocolate Brownies: Fold in 1/2 cup of sugar-free chocolate chips into the batter for extra chocolatey goodness.
- Spiced Brownies: Add 1/2 teaspoon of cinnamon and 1/4 teaspoon of nutmeg to the dry ingredients for warm, spiced brownies.
Variation Tip: Don’t be afraid to get creative and try your own flavor combinations! Think about your favorite flavors and how they might taste in a brownie.
Conclusion: Bake, Enjoy, and Share!
Congratulations! You’re now ready to bake your own amazing low sugar brownie recipe. This recipe is all about enjoying delicious treats without compromising your health goals. These brownies are perfect for a guilt-free dessert, a healthier snack, or even a special occasion. They are easy to make, fun to customize, and most importantly, incredibly tasty!
So, go ahead, preheat that oven, gather your ingredients, and get baking! Don’t be afraid to experiment with different variations and find your perfect low sugar brownie recipe. And most importantly, share your delicious creations with friends and family – they’ll never guess they’re low in sugar!
FAQs: Your Brownie Questions Answered
Q: Are these brownies really low in sugar?
A: Yes! By using a sugar substitute instead of regular sugar, we significantly reduce the sugar content compared to traditional brownie recipes. This makes them a much healthier option.
Q: What kind of sugar substitute should I use?
A: Erythritol and Stevia blends are great choices because they taste good and don’t have a strong aftertaste for most people. Monk fruit sweetener is another good option. Just follow the package instructions for conversions, as sweetness levels can vary.
Q: Can I use regular sugar instead of a sugar substitute?
A: Yes, you can, but then they won’t be low sugar brownie recipe! If you want to use regular sugar, you can substitute it in equal amounts. However, keep in mind this will increase the sugar content significantly.
Q: Are these brownies suitable for people with diabetes?
A: While this recipe is lower in sugar than traditional brownies, it’s always best for individuals with diabetes to consult with their doctor or a registered dietitian before making significant dietary changes. They can help determine if this recipe is appropriate for their specific needs and blood sugar management plan.
Q: How do I know when the brownies are done?
A: Insert a toothpick into the center of the brownies. If it comes out with moist crumbs (not wet batter), they are done. They should be slightly fudgy in the center, not completely dry.
Q: Can I double the recipe?
A: Yes! To double the recipe, simply double all the ingredients and bake in a 9×13 inch pan. You might need to add a few extra minutes to the baking time.
Q: Why are my brownies dry?
A: Overbaking is the most common reason for dry brownies. Make sure to check them for doneness around the 20-minute mark and don’t bake them for too long. Also, make sure you are using the correct measurements for ingredients, especially flour.
Q: Can I make these brownies vegan?
A: Yes! You can easily make these brownies vegan by substituting the eggs with flax eggs or applesauce, and using coconut oil or another plant-based oil instead of butter.<br> body {<br /><br> font-family: Arial, sans-serif;<br /><br> line-height: 1.6;<br /><br> margin: 20px;<br /><br> }<br /><br> h1, h2, h3 {<br /><br> color: #333;<br /><br> }<br /><br> h1 {<br /><br> font-size: 2.5em;<br /><br> }<br /><br> h2 {<br /><br> font-size: 2em;<br /><br> }<br /><br> h3 {<br /><br> font-size: 1.5em;<br /><br> }<br /><br> p {<br /><br> margin-bottom: 15px;<br /><br> }<br /><br> ul, ol {<br /><br> margin-bottom: 15px;<br /><br> }<br /><br> li {<br /><br> margin-bottom: 8px;<br /><br> }<br /><br> strong {<br /><br> font-weight: bold;<br /><br> }<br /><br> .recipe-table {<br /><br> width: 100%;<br /><br> border-collapse: collapse;<br /><br> margin-bottom: 20px;<br /><br> }<br /><br> .recipe-table th, .recipe-table td {<br /><br> border: 1px solid #ddd;<br /><br> padding: 8px;<br /><br> text-align: left;<br /><br> }<br /><br> .recipe-table th {<br /><br> background-color: #f2f2f2;<br /><br> }<br /><br> .highlight {<br /><br> background-color: #ffffcc;<br /><br> padding: 5px;<br /><br> }<br /><br>